Shopify Integration
Integrating CoveyThis Translate into any website is incredibly simple, and Shopify platform is no exception. Just follow our simple, step-by-step guide to add ConveyThis to your Shopify site in just a few minutes.
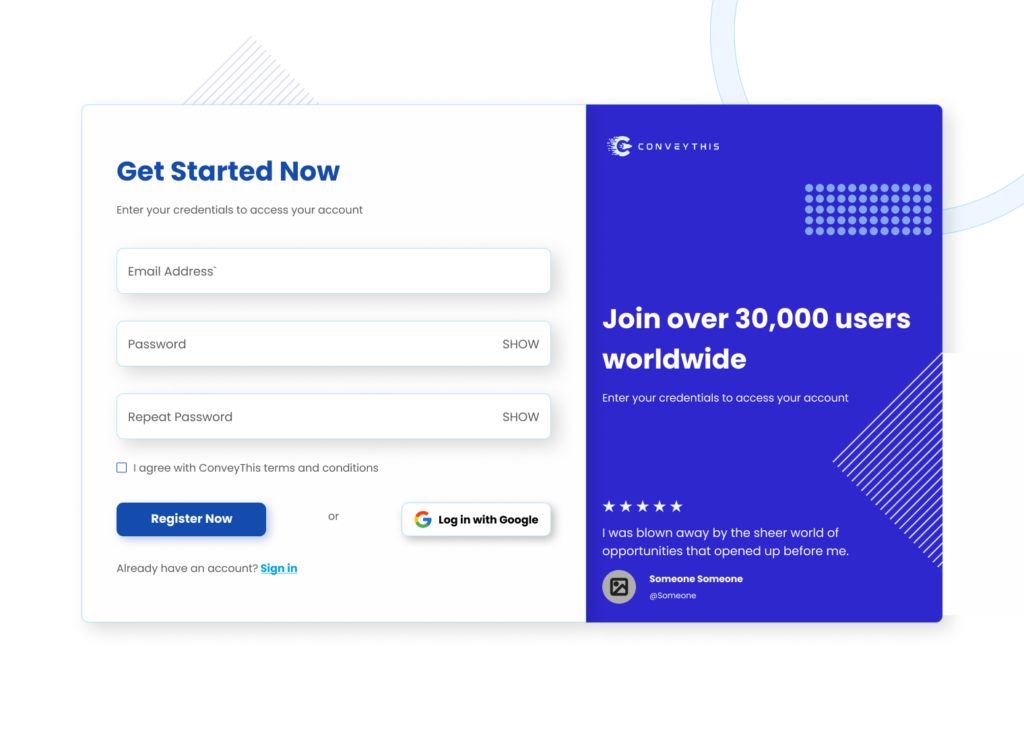
1) Create a ConveyThis Account
To start of, your ConveyThis account dashboard lets you view and manage all your translations. Simply create a ConveyThis account here.
2) Select Your Plugin via ConveyThis
The website technology refers to the specific CMS you used to build your website, in this instance it’s Shopify.
Click “Next” to proceed to the following step.

After clicking on “Next”, enter your domain name and indicate the language(s) you want to translate your website into.
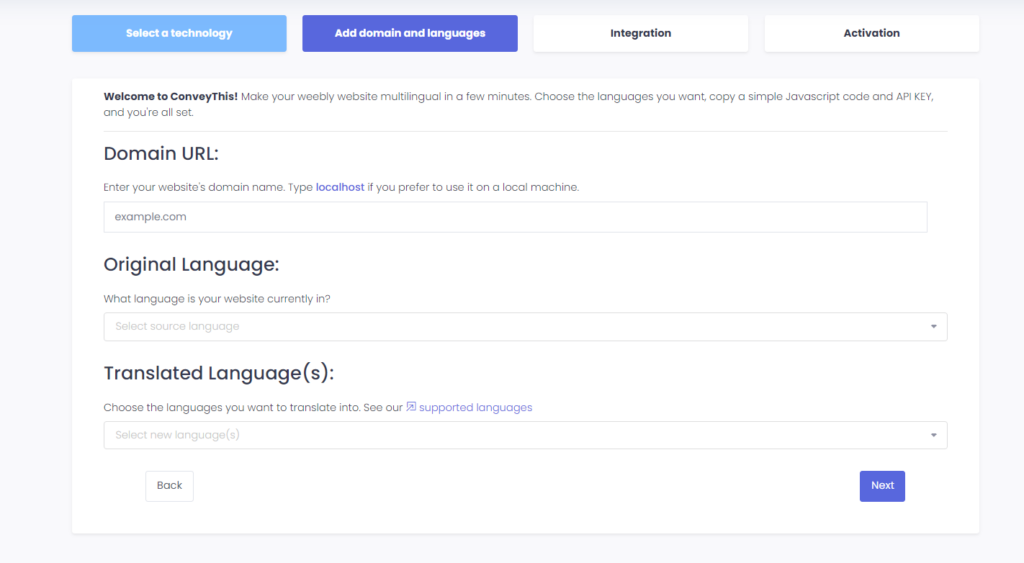
Click “Next” to go to the next step.
3) Install the ConveyThis Plugin Through Shopify App Store
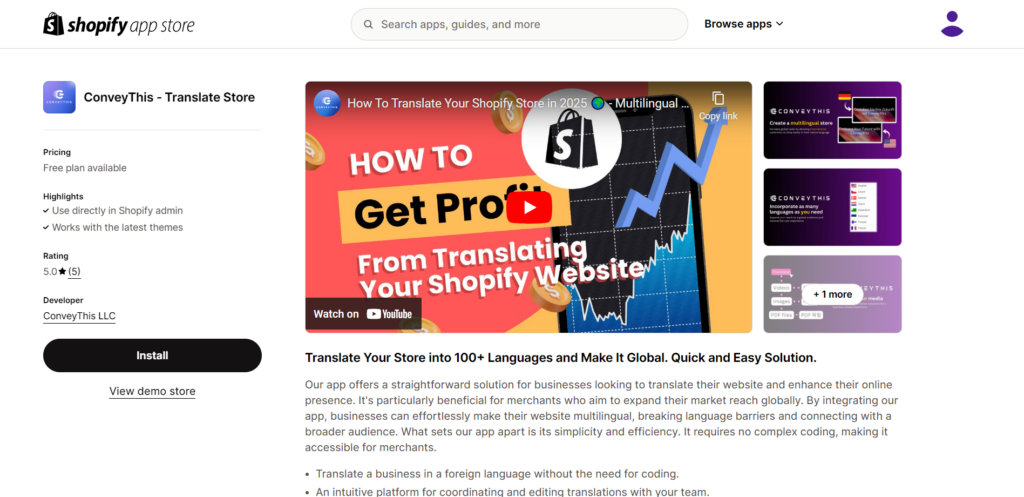
Go to your admin dashboard and click on “Apps” > “Visit Shopify App Store.” Search for ConveyThis, and once you’ve found us, click on “Install”.
3.1) Create your account via the Shopify app or Log In to your existing ConveyThis account
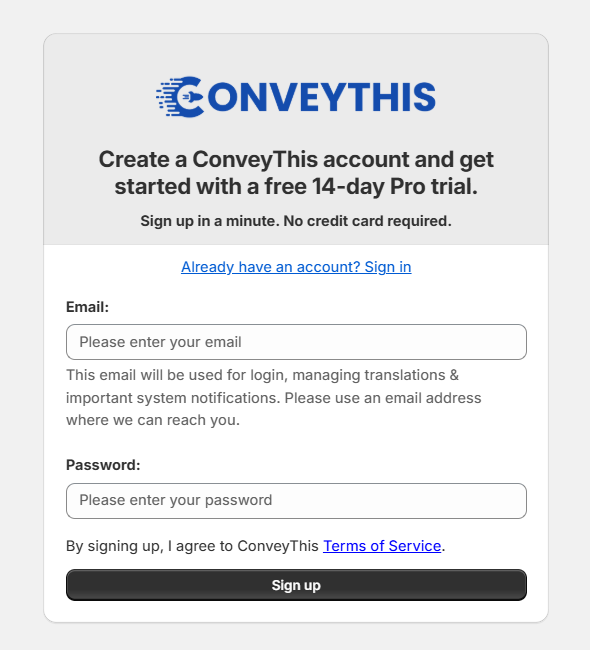
If you already have an existing ConveyThis account, you’ll be able to directly create a new project or reuse an existing project if needed.
If you don’t have an account, all you need is to enter a valid e-mail address and a password to start your 14-day Pro Trial.
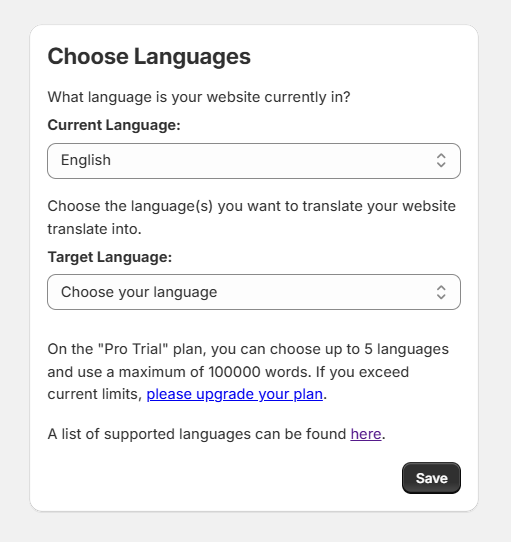
3.2) Choose your languages
Once you’ve set up your ConveyThis account, you’ll be asked to choose the language your store is currently written in, and the language(s) you’d like to translate it to.
3.3) Activate ConveyThis Plugin
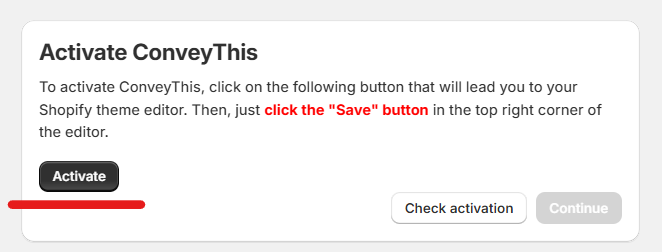
Once the languages are defined, you’ll need to activate ConveyThis in your theme. To do so, click on the “Activate” button.
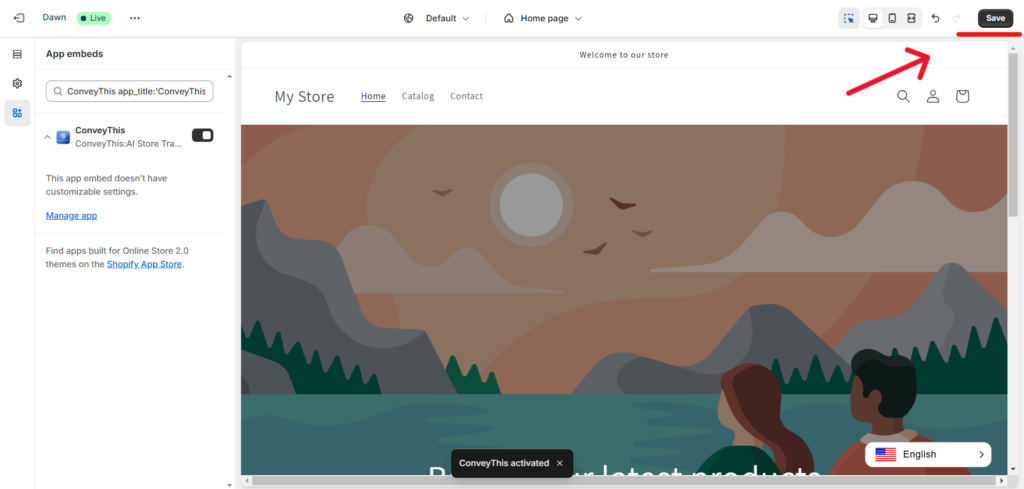
After which you will need to click the “Save” button at the top right corner of the editor.
Once saved, you can return to this page and click “Check activation” to finalize the integration.
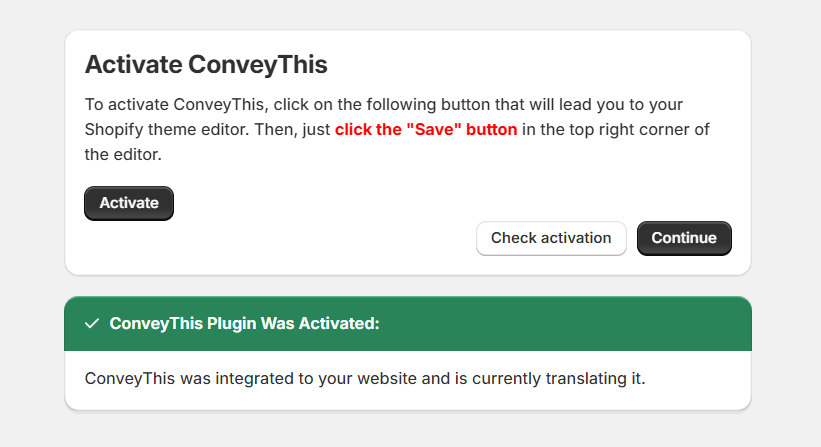
3.4) You’ve gone multilingual!
Now that your store has the ConveyThis plugin activated, you can start customizing your translations and/or the appearance of your language-switch button by clicking “Return To Dashboard”.

4) Install the ConveyThis Plugin Through Copy & Paste
If you would like to choose a different route on the installation process for the ConveyThis widget, you could always try to Copy & Paste our code snippet.
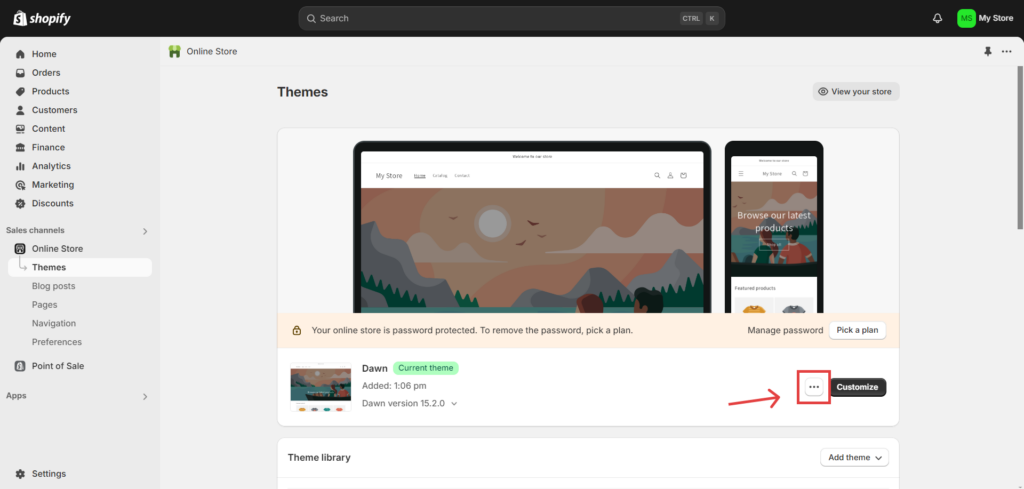
First, you’ll have to navigate to to Shopify Admin > Online Store > Themes and in here you’ll see the “…” button.
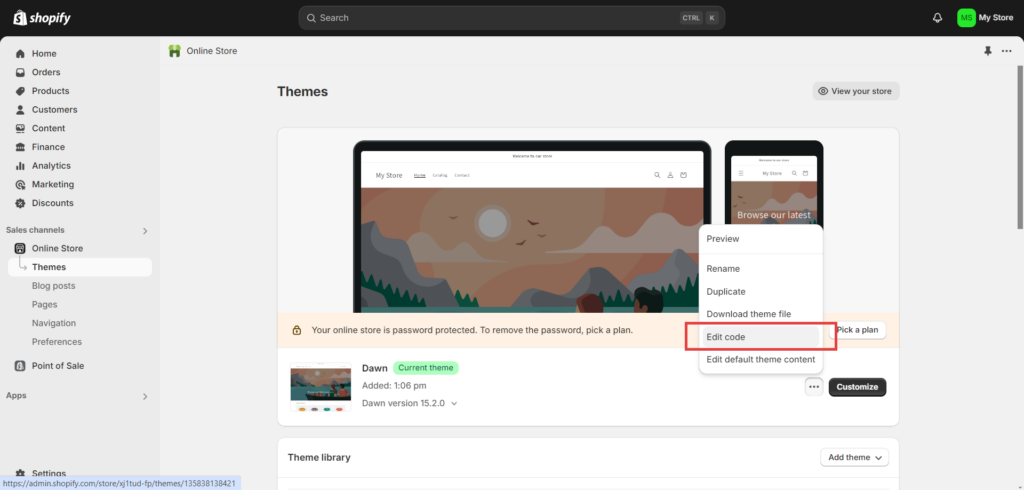
Once you’ll press on the “…” button, you’ll get a list of options, and among them, choose the “Edit code” option.
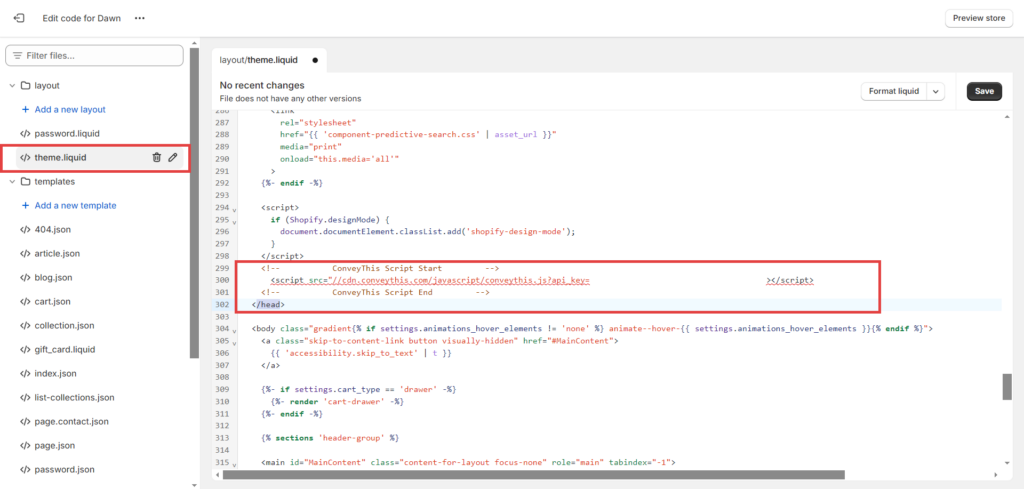
Once you navigate to “Edit code”, insert the provided code snippet into the theme.liquid file, just before the closing </head> tag.
5) You’re all done!
That’s it. Go to your website and see the language-switch button at the bottom right. It might take a few minutes to appear, so don’t worry if you must wait a bit.
Try changing the language when the language switcher appears–and, like magic, your website is multilingual! You can now go to your ConveyThis dashboard to manage all your translations.
Congratulations, now you can start translating your website!
*If you want to customize the button or get familiar with an additional settings, please go back to the main configuration page (with language settings) and click «Show more options».
How to Translate Shopify Checkout Page?
1) Choose the Target Language
Firstly, you have to go to your Online Store > Themes > Edit languages.
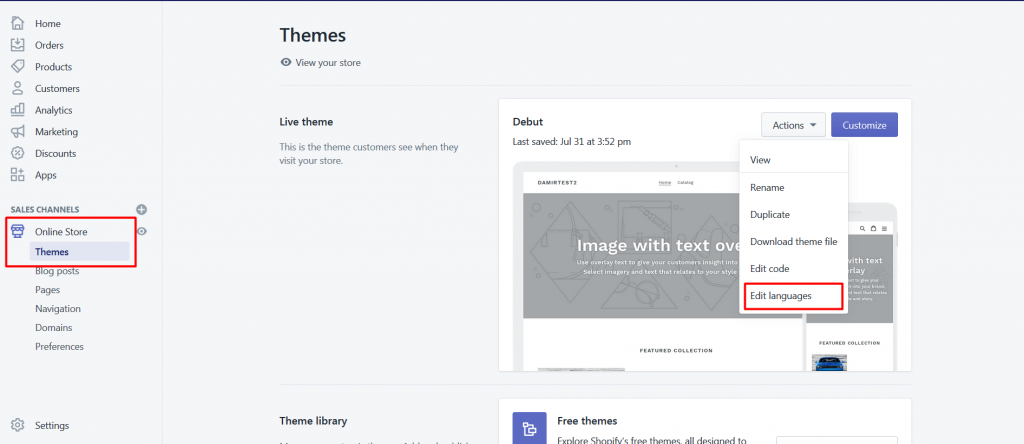
Then choose language you want to translate:
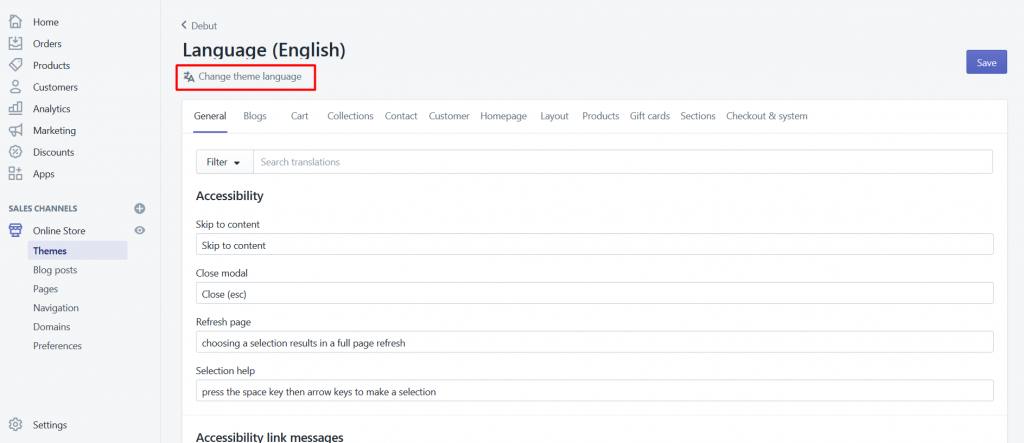
Follow below steps for all your target languages:
If you see your target language in the list, then no action needed.
Otherwise, press on Other languages… and select your target language.
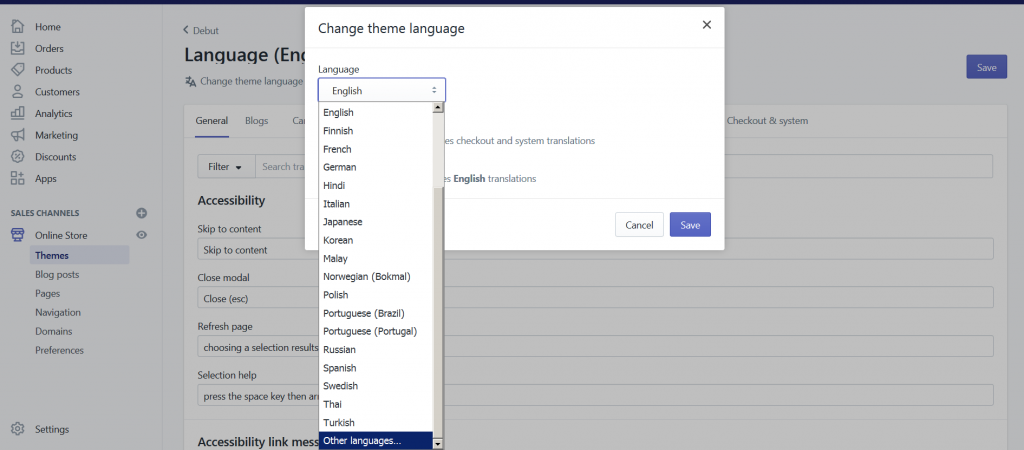
2) Navigate to Checkout
Go to Checkout & system tab and provide your custom translation for selected language.
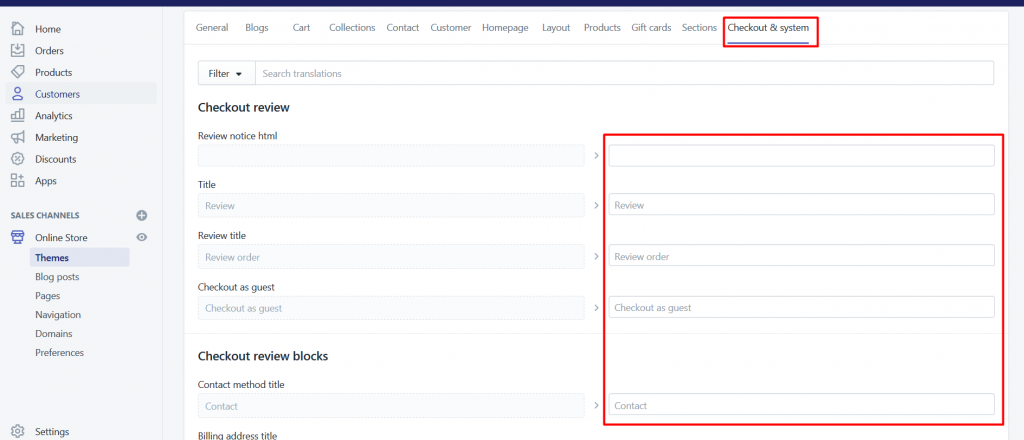
Finally, choose your original language back.

3) You’re all done!
That’s it. Please visit your website, refresh the page and the shopify checkout page will be also translated.
Your Shopify store should be fully translated now.