WebFlow Translation Plugin
Ang pagsasama ng ConveyThis sa iyong site ay mabilis at madali, at ang WebFlow ay walang exception. Sa loob lamang ng ilang minuto, matututunan mo kung paano mag-install ng ConveyThis sa WebFlow at simulan itong bigyan ng functionality na multilinggwal na kailangan mo.
1) Lumikha ng ConveyThis Account
Upang magsimula, hinahayaan ka ng iyong ConveyThis na dashboard ng account na tingnan at pamahalaan ang lahat ng iyong mga pagsasalin. Gumawa lang ng ConveyThis account dito.

2) Piliin ang Iyong Plugin sa pamamagitan ng ConveyThis
Ang teknolohiya ng website ay tumutukoy sa partikular na CMS na ginamit mo sa pagbuo ng iyong website, sa pagkakataong ito ay Drupal ito.
I-click ang “Next” para magpatuloy sa sumusunod na hakbang.

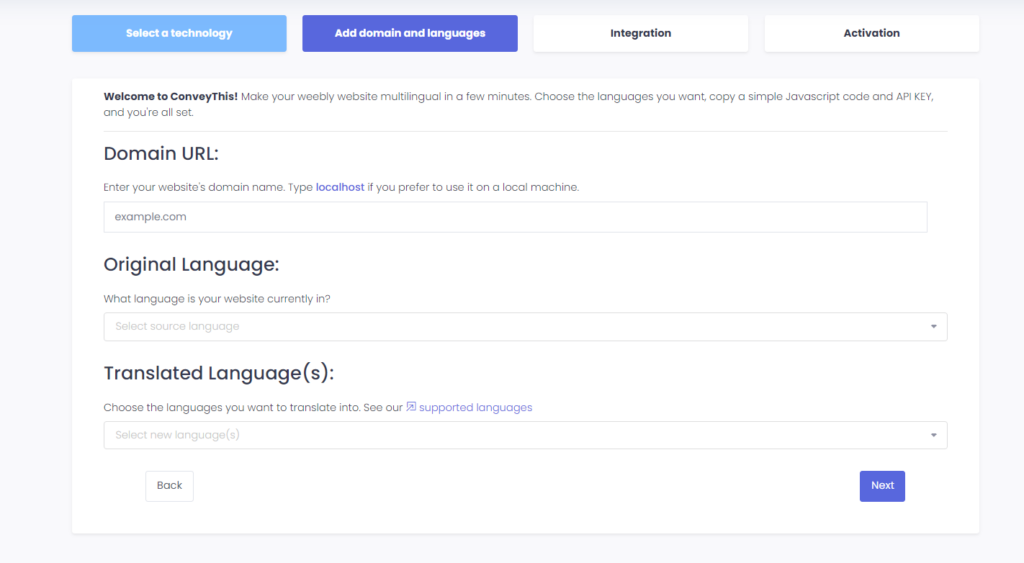
Pagkatapos mag-click sa “Next”, ilagay ang iyong domain name at isaad ang (mga) wika kung saan mo gustong isalin ang iyong website.

I-click ang “Next” para pumunta sa susunod na hakbang.
3) I-install ang ConveyThis Plugin
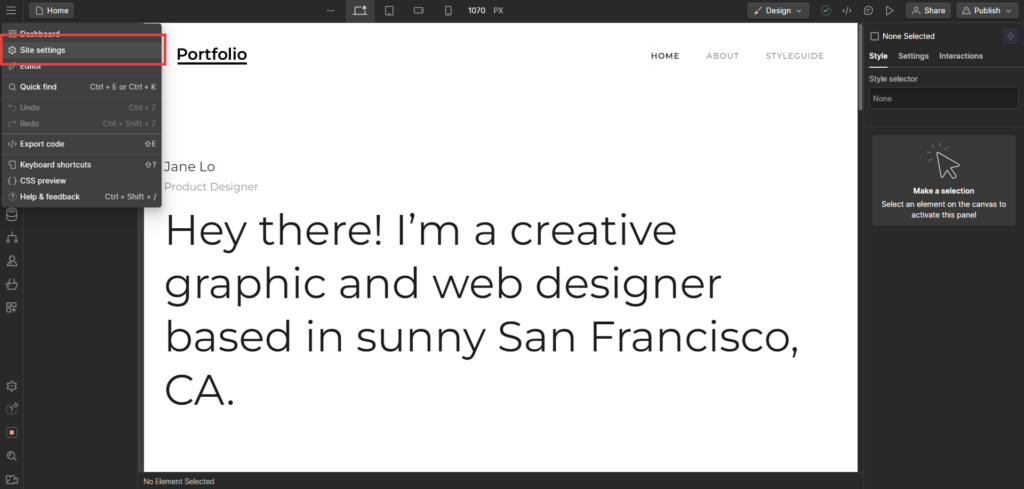
Pumunta sa "Mga Setting ng Site" sa iyong tagabuo ng WebFlow site.

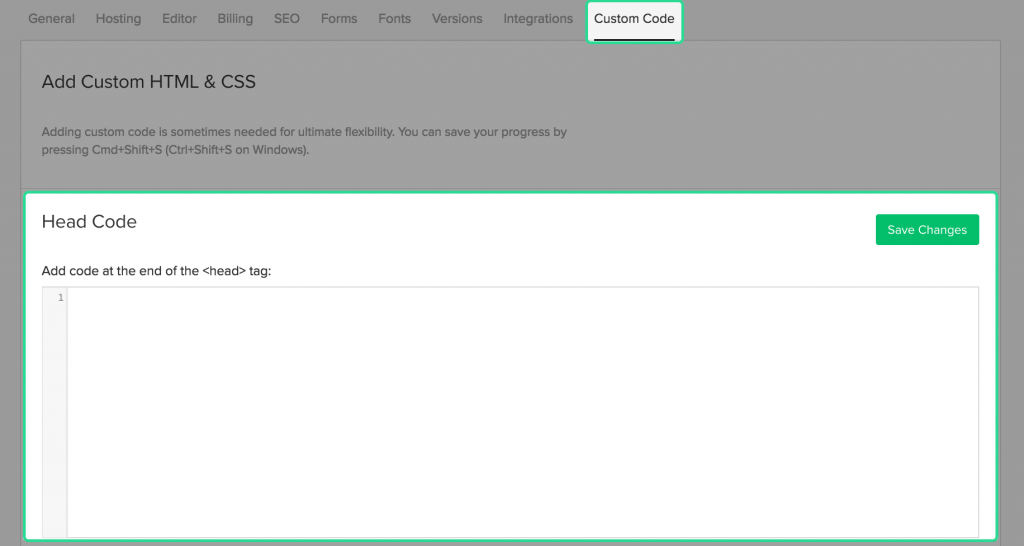
Pagkatapos nito, pumunta sa tab na "Custom Code" at i-paste ang code kung saan kinakailangan. Panghuli, i-save ang iyong mga pagbabago at i-reload ang page.
*Kung gusto mong i-customize ang button o maging pamilyar sa karagdagang mga setting, mangyaring bumalik sa pangunahing pahina ng pagsasaayos (na may mga setting ng wika) at i-click ang "Magpakita ng higit pang mga opsyon".
4) Tapos ka na!
Yun lang. Pumunta sa iyong website at tingnan ang button na lumipat ng wika sa kanang ibaba. Maaaring tumagal ng ilang minuto bago lumitaw, kaya huwag mag-alala kung kailangan mong maghintay ng kaunti.
Subukang baguhin ang wika kapag lumitaw ang tagapagpalit ng wika–at, tulad ng mahika, multilinggwal ang iyong website! Maaari ka na ngayong pumunta sa iyong ConveyThis dashboard upang pamahalaan ang lahat ng iyong mga pagsasalin.
Binabati kita, maaari mo na ngayong simulan ang pagsasalin ng iyong website!
